
ADMIN ONLY: You must be an Admin to manage Property Groups in your account. You can tell if you have Admin privileges because you will have the Company menu option in your profile. If you are not an Admin, please have an Admin for your account contact support@sitecompli.com.
Property Groups are a way for you to organize your properties in the way that your team finds most helpful. This guide goes over creating and managing Property Groups for your organization.
Overview
Property Groups can help organize your team's buildings in a way that makes sense for your organization. Once your Property Groups are set up, you can also change your portfolio view to see the information that only pertains to a specific property group by clicking on the Portfolio drop-down menu and selecting the desired Property Group from the list.
To create a new Property Group in your account:
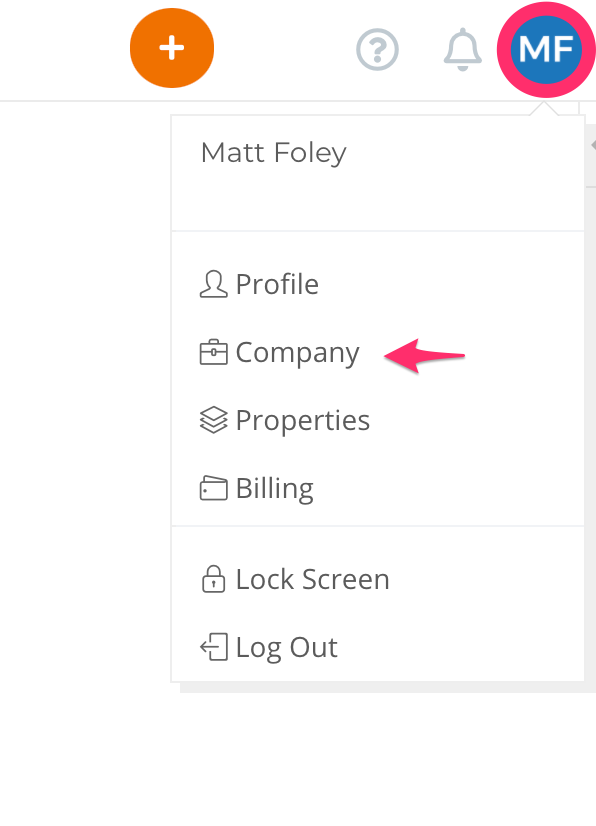
Click the circular icon (the one that contains your initials or your picture) in the upper right-hand corner and Click Company:
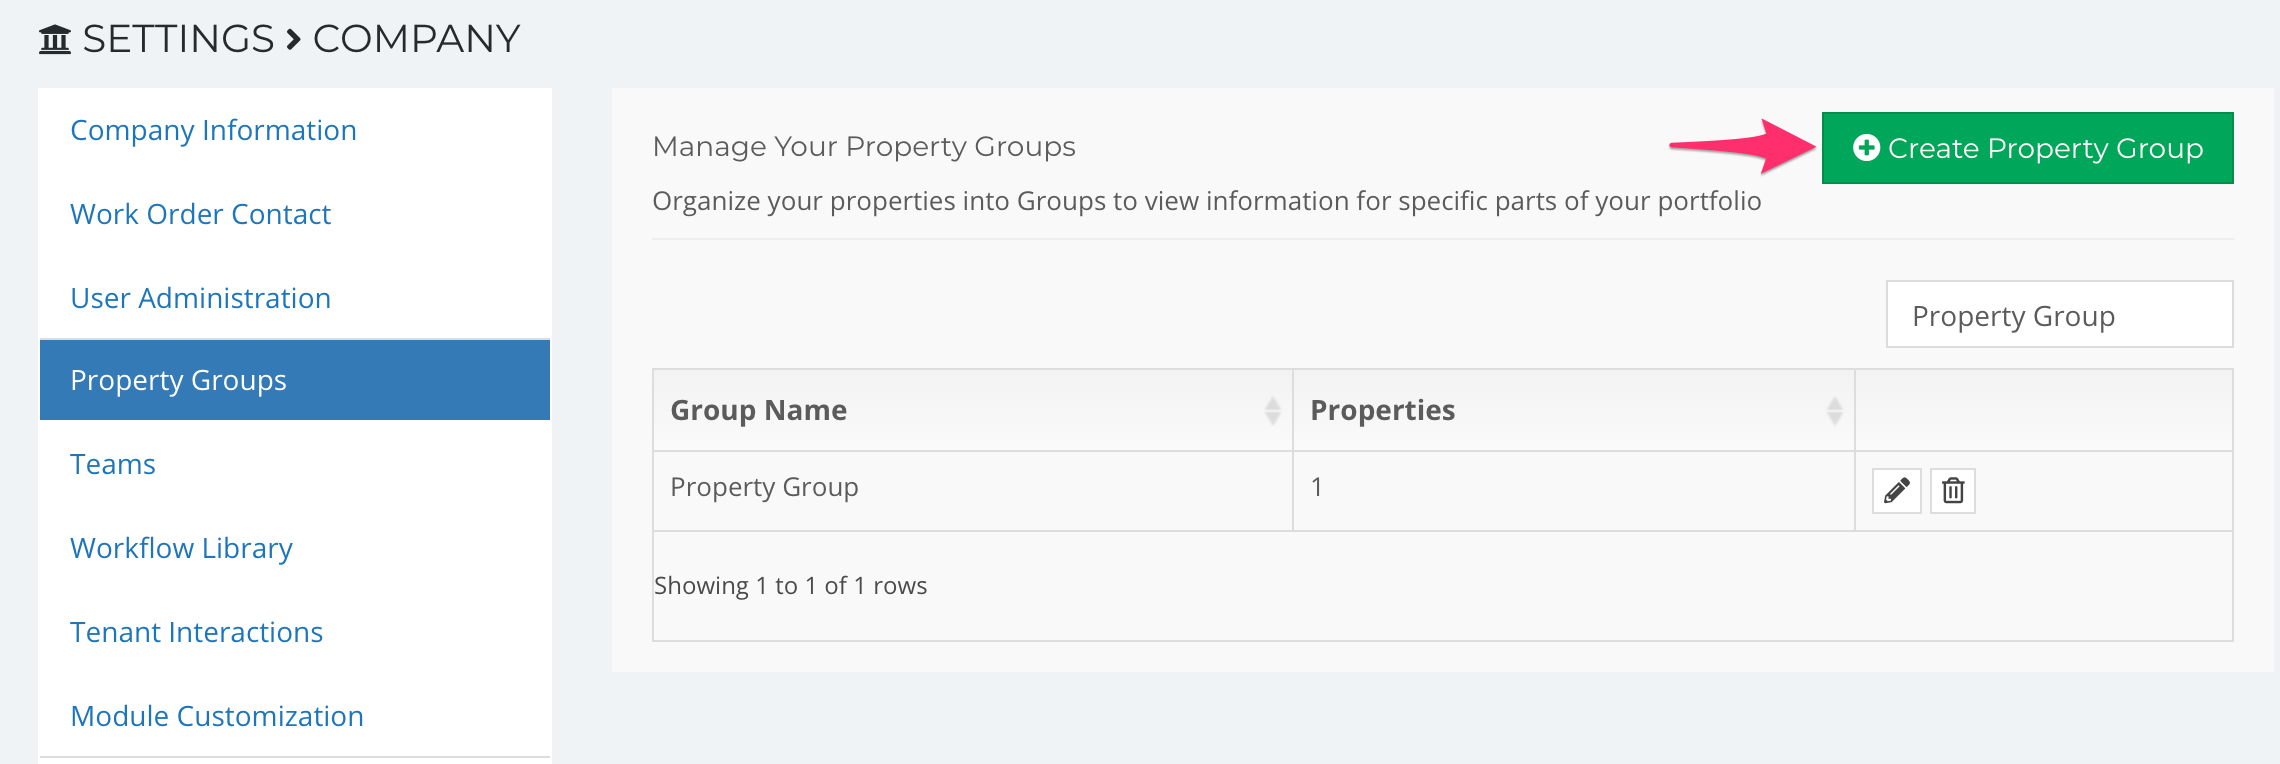
Click Property Groups and Click Create Property Group
Add a name for your new group and select all the properties from the drop-down menu to be added to the new group:
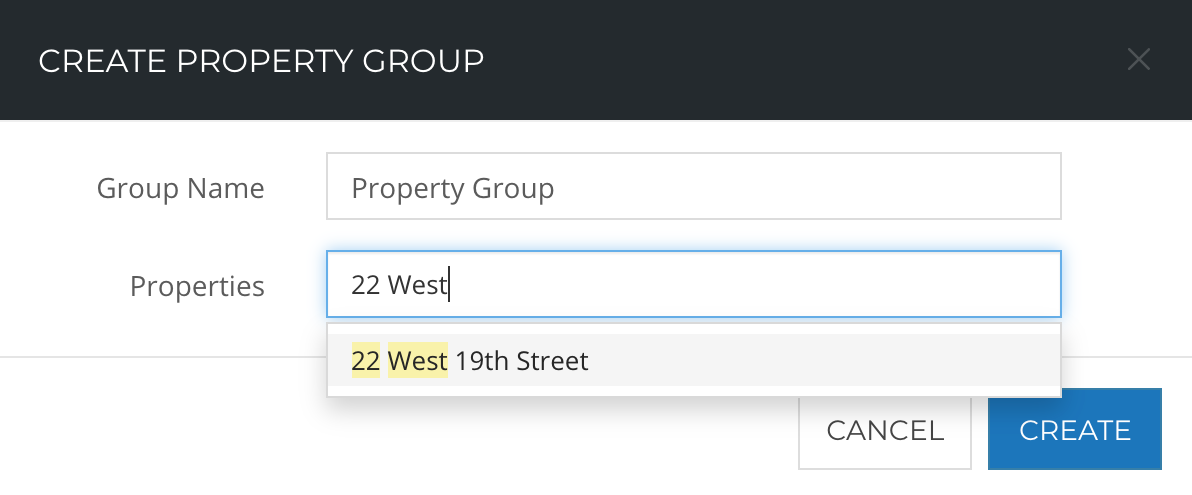
Click Create to save your Property Group
TIP: Changes to Property Groups are on the organization level, and not just for your personal user account. All Users will see the Property Groups if they're given access to the properties in the group.
Editing Property Groups
You can edit properties in an existing Property Group from both the Property Groups page and the Property's page.
To edit the Property Group from the Property Groups page:
- Click the circular icon (the one that contains your initials or your picture) in the upper right-hand corner
- Click Company
- Click Property Groups
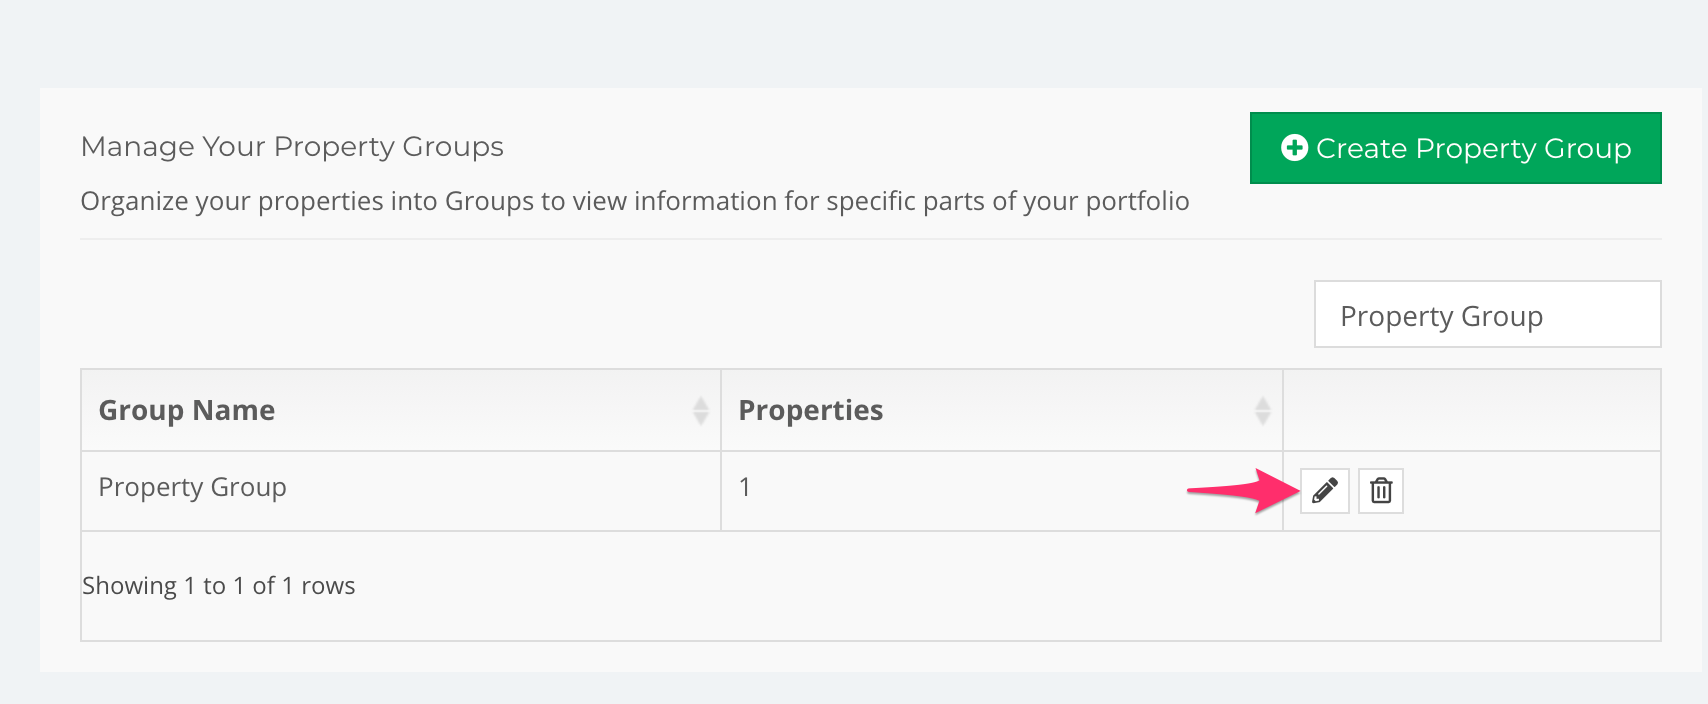
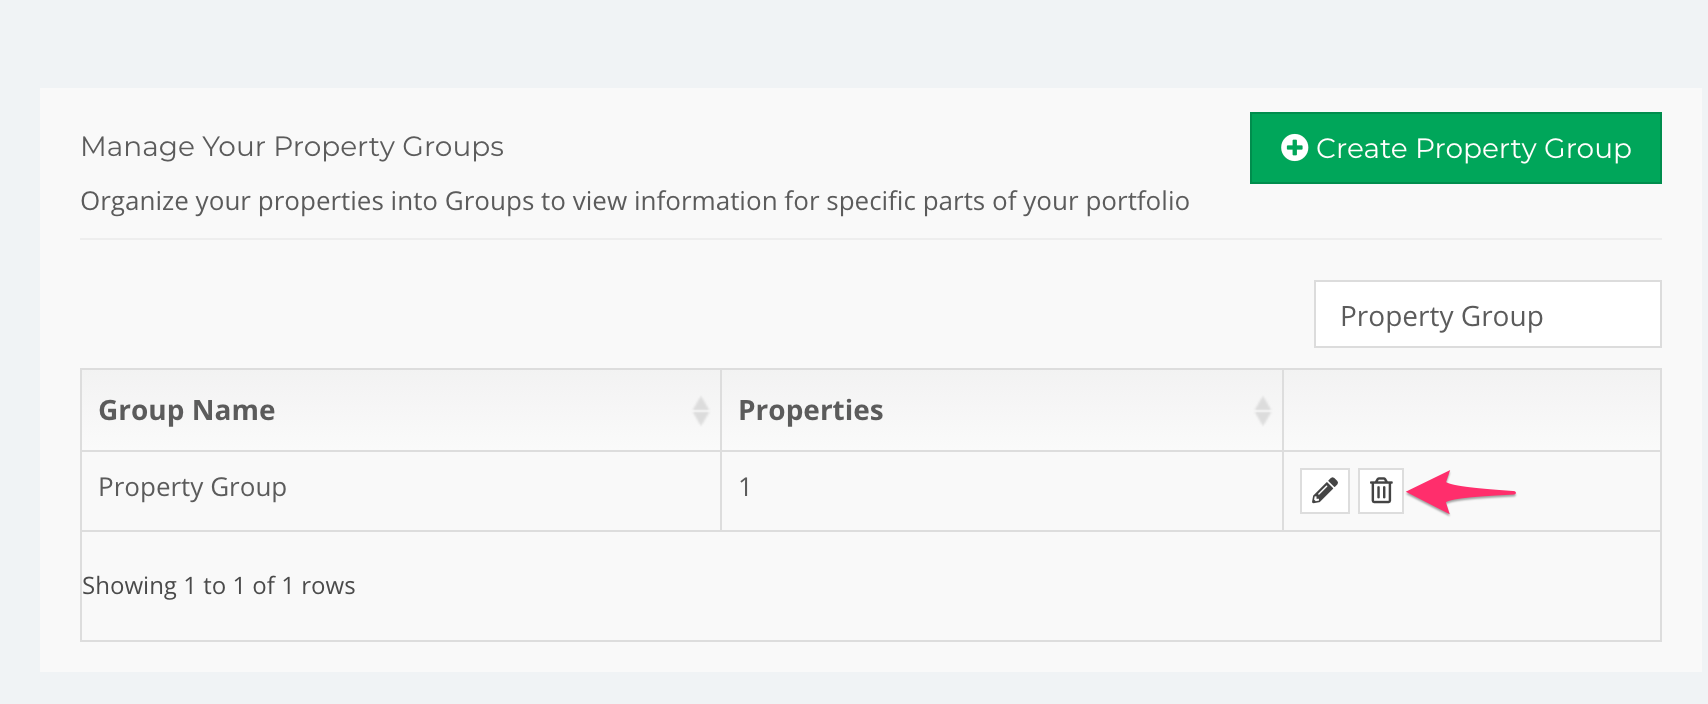
- Click the pencil icon next to the Property Group you'd like to edit
- Edit the Group:
- To Add: Select new properties from the drop-down menu
- To Remove: Click the X on the property name
- Click Update
To edit the Property Group from the Property's page:
- Click the circular icon (the one that contains your initials or your picture) in the upper right-hand corner and click Properties:
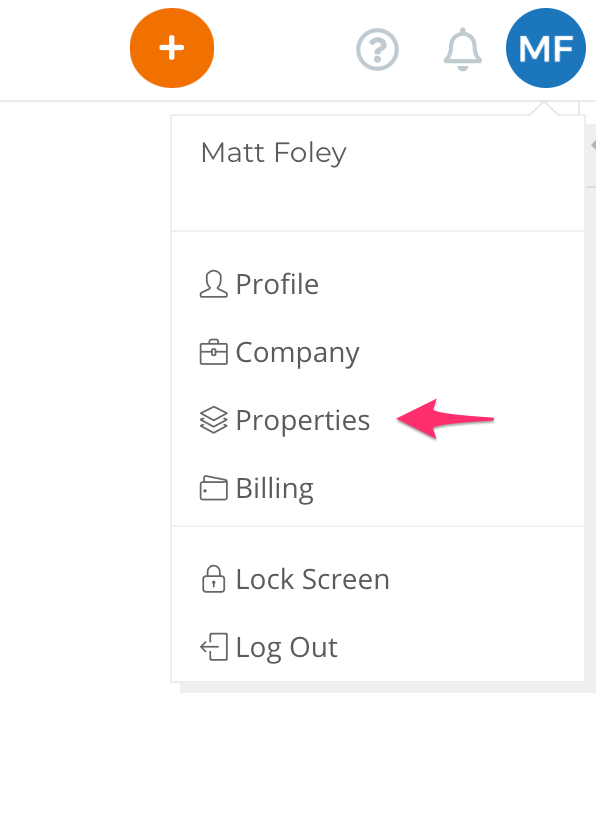
- Select the property from the scrolling list
- Click the Groups tab
-
To add the property to the Group:
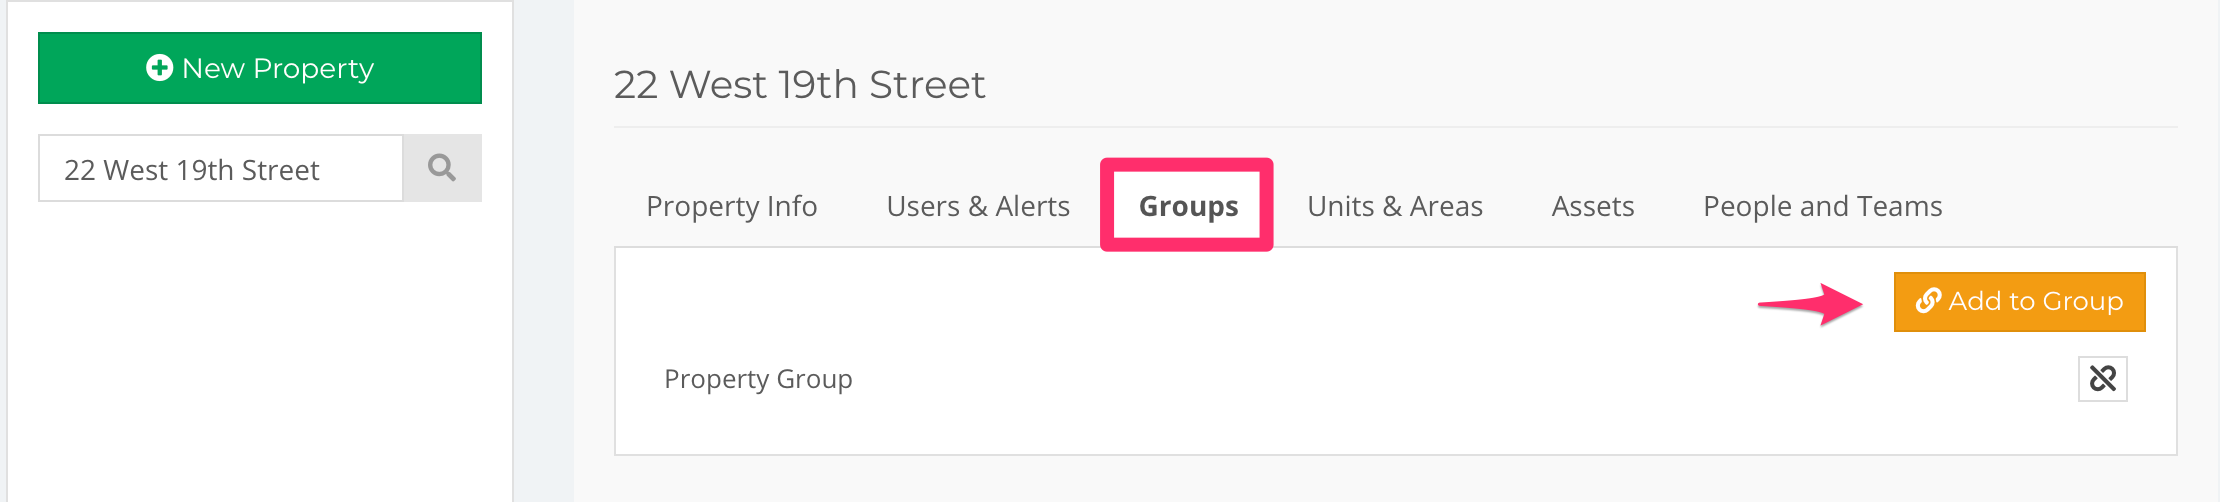
- Click Add to Group
- Select the Property Group from the drop-down list
- Click Add
-
To remove the property from a Group:
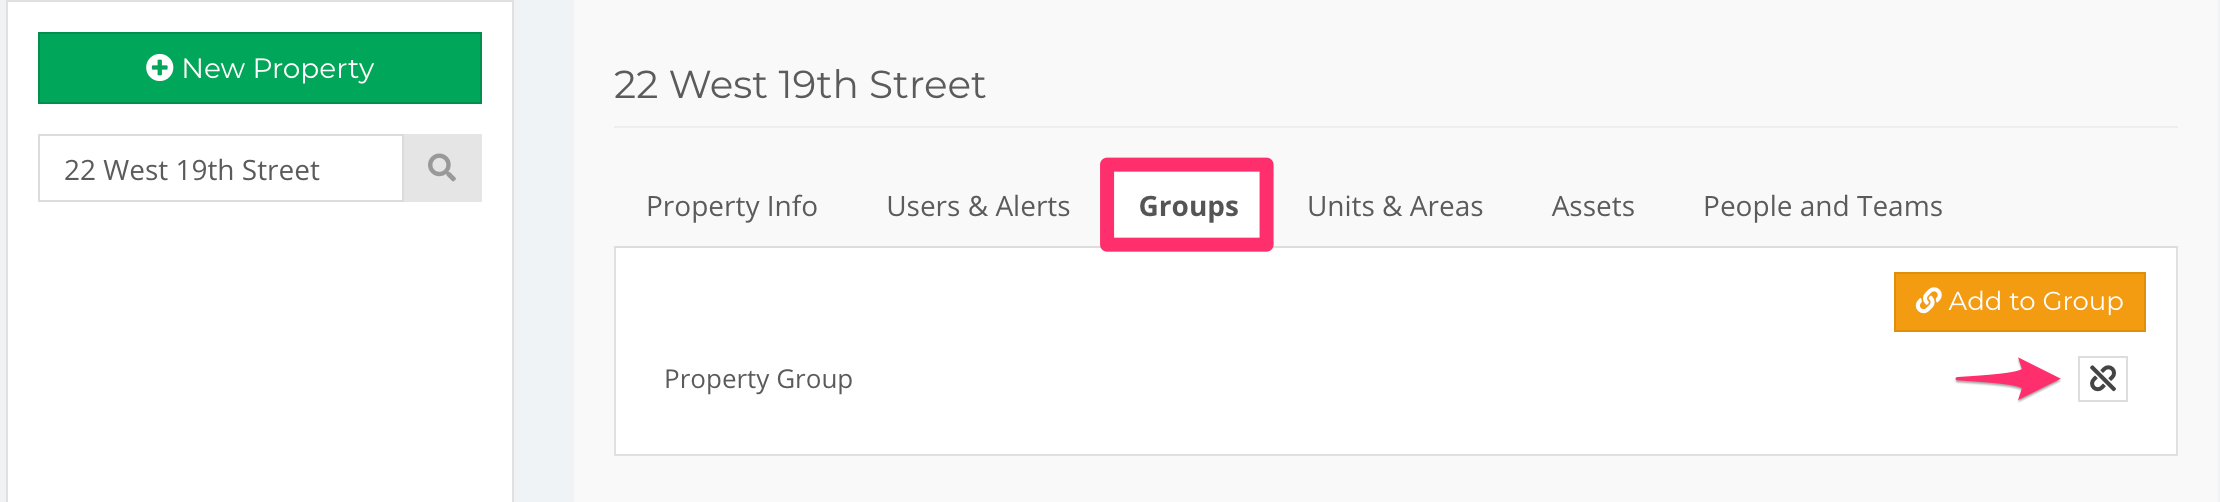
- Click the broken chain icon next to the Property Group name
- Click OK
-
To add the property to the Group:
Removing Property Groups
Removed Property Groups will be deleted and you won't be able to recover the group once it's been removed. To remove an existing Property Group:
- Click on the circular icon (the one that contains your initials or your picture) in the upper right-hand corner
- Click Company
- Click Property Groups
- Click the trash can icon next to the Property Group you'd like to remove
- Click OK to confirm
Comments
0 comments
Article is closed for comments.